
ParGUI Instructions

Written Guide
Welcome
Welcome to the instructions for using ParGUI. As you read through this PDF, you'll find all the information you need to properly use and care for our product.
Please keep in mind that this instruction guide is the property of Hash Studios LLC and is protected by copyright laws. Any unauthorized reproduction or distribution of this guide is strictly prohibited.
License Agreement
We want to make sure that you're fully informed about your purchase of ParGUI. As part of your purchase, you should know that by downloading or purchasing the software, you are automatically accepting our license agreement.
This agreement is in place to protect both you and our company. It ensures that you're getting a legally obtained product that you can use as intended, and it allows us to continue creating and improving our products for you and other customers.
We understand that license agreements can be a bit confusing, so we encourage you to take a moment to read through the agreement and reach out to us if you have any questions. Our goal is to make your experience with ParGUI as positive as possible and we want to make sure you have all the information you need to make an informed decision. Thank you for choosing ParGUI, we truly appreciate your support.
How to Install
We understand that not everyone is an expert in Unity or coding, which is why we've designed ParGUI to be as easy to get started with. With just a few simple steps, you can start using our tool in your world.

1. Open a new project in whichever version of Unity that supports UdonSharp.
2. Next, open the .zip file you've purchased from Hash Studios LLC and extract it.
3. Open the "ParGUI.unitypackage" file and import all the items.


4. After that, navigate to your assets folder and find the ParGUI folder. Open it and look for "ParGUI-Prefab"


5. Incorporate the GUI into your world using the "Par-GUI Prefab" object.
6. Import TMP Essentials for added functionality.

7. Customize the script component within the "Par-GUI Prefab" object as desired.
● Make sure to insert your main world light as a part of the “Lighting” array and the “Main World Light”.
● For any colliders you want the player to be able disable, make sure you put them in the “Collider” array.

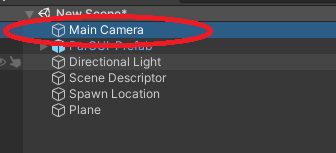


8. Obtain the desired reference camera and apply the "Post Processing Layer" component. Set the layer to "Everything" or “Default.
9. Setup any Button Preset information in the "Par-GUI Prefab" script component. What each value ranges from and represents is listed below.

Default Preset:
Daytime = 0
Sunset = 1
Night Time = 2
Mondo = 3
Warm Day = 4
Alien Planet = 5
Dark Night = 6
Rainy Day = 7
Pink Cake = 8
Underwater = 9
Darkness Intensity:
0.0 - 1.0
Bloom:
0 - 5
Sun Intensity:
0.1 - 3.0
Fog Intensity:
0.0 - 0.5
Sun Color:
White = 0
Red = 1
Green = 2
Blue = 3
Yellow = 4
Pink = 5
Fog Color:
White/Gray = 0
Red = 1
Green = 2
Blue = 3
Yellow = 4
Pink = 5
Overall Color:
White = 0
Orange = 1
Purple = 2
Yellow = 3
Pink = 4
Light Blue = 5
Gray = 6
And that's it! You're now ready to start using ParGUI in your world. If you have any issues or questions, please don't hesitate to reach out to us. We're always here to help.